Monday, April 17, 2006

Dovetail Box


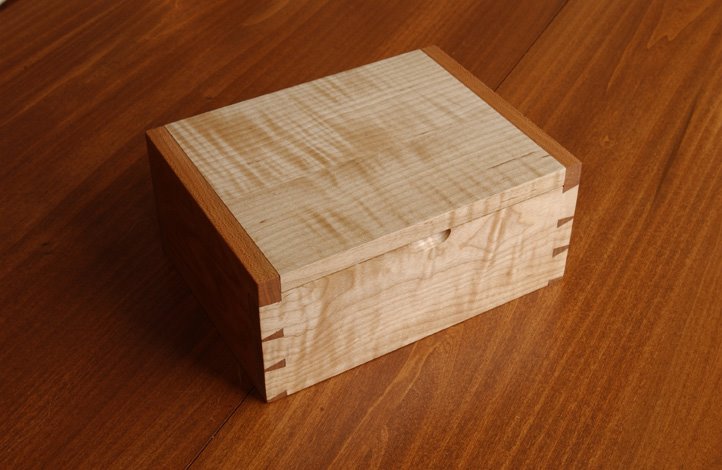
This was an exercise in hand-cut dovetails, and an excuse to use up some small amounts of curly maple that I had in stock. The darker wood is cherry. Oil/poly finish.

Small Box


This small box is made from birdseye maple, with a cherry top. The splines and feet are made from cherry as well. Hand-rubbed oil/poly finish.

Sunday, April 16, 2006

Night Tables

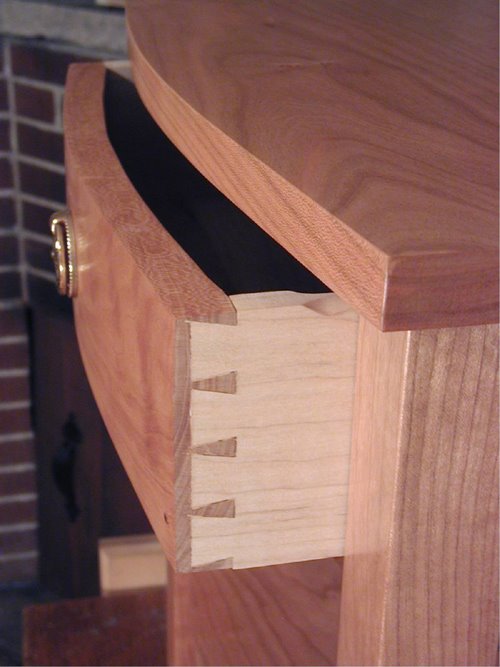
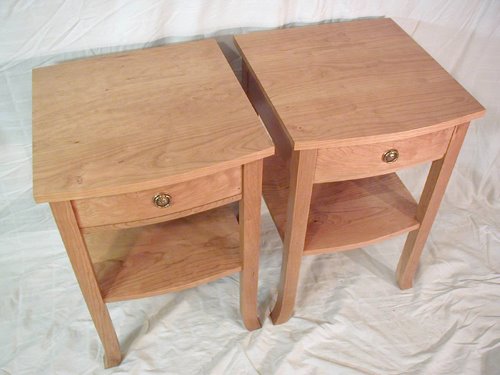
A pair of night tables. Cherry. Curved front.


Hand-rubbed oil/poly finish. No stain. The colour is actually quite a bit richer than this photo shows. It's the lighting in the photograph.

The picture below shows one of the tables now in use at its new home in a bookstore. This shows the colour as it really appears.


The curved drawers are a little tricky, but worth the effort. The secret is to cut the dovetails while the drawer front is still rectangular, then cut the curves. The inside curve is cut so that it misses the dovetails. This allows the dovetails to come together at a 90 degree angle. The other way is to cut angled dovetails, which is much more difficult.

Saturday, April 15, 2006

Tilt-and-Turn Table


This is a reproduction of an 18th century walnut tilt-and-turn table. The original was made in the Philadelphia area. It now resides in the Metropolitan Museum of Art in New York. This one is also made of walnut, with an analine dye and hand-rubbed oil finish.

This table has a "dishrim" top. It is made by creating a round top, then "dishing" it out. I used a router. In the old days, this would have been done on a giant lathe.

This is called a tilt-and-turn table because it can move two ways.
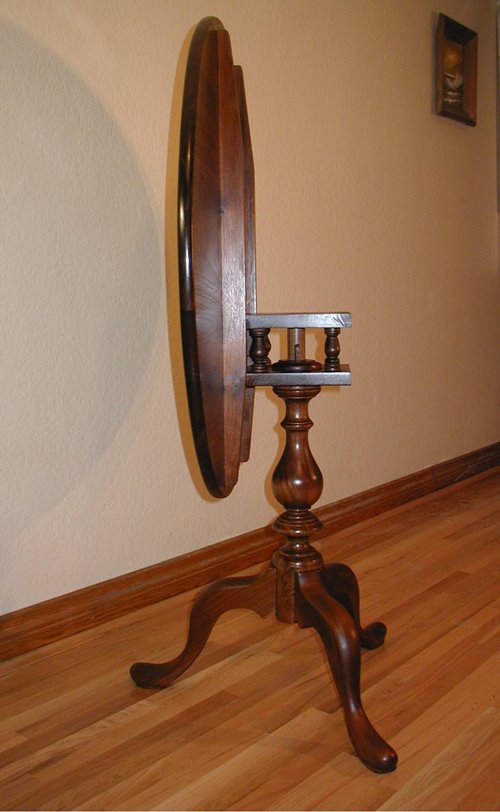
The top can be moved to an upright position. This allows the table to be placed closer to a wall, to save space. In the horizontal position, it can also rotate. The lady of the house could serve tea by putting a cup on the table and then rotating it (carefully!) toward her guest.


A side view. This shows the "birdcage" mechanism, which allows the tilt-and-turn to take place. The legs are joined to the column with sliding dovetails. The legs require a large amount of shaping with hand tools.


A closeup view of the birdcage. Releasing the locking mechanism allows the table to tilt. You must remove a "key" (the little wedge-shaped thing inside the birdcage) for the top to spin.

I love furniture that does tricks!

Friday, April 14, 2006

Chest-on-Frame Dresser

This is a Queen Anne-style piece of furniture.

The wood is cherry. This piece was stained, then finished with several coats of wipe-on oil/poly mix. Ordinarily I prefer not to stain cherry, since an oil finish alone is beautiful. However, there were some variations in the cherry boards, so a stain pulled it all together into one uniform colour.


The legs are the most complex part of the project. They are rough-cut on the bandsaw. The feet are then turned on a lathe. Mortises are cut to take tenons from the rails (or aprons as some call them). The final shaping of the legs is done by hand, using a combination of rasps, chisels, saws and sandpaper.

The base, during construction. It may look fragile, but built properly, it's very strong.

My Workbench


My workbench.

It's a traditional European design. I built it using a plan from Lee Valley. The top and base are made from Beech. The top is mounted to the base on two large dowels, so it can be removed if the bench has to be moved.

Finish is tung oil, which I renew once a year.

It's amazing what a difference a proper woodworking bench makes!